
Have you ever returned from an epic trip, only to find your videos look blurry, noisy, or just… off? You’re not alone. Whether it’s shaky footage from a hike, low-light city night scenes, or pixelated drone shots, many travel videos fail to capture the beauty of the real experience. But thanks to CapCut’s AI Video Upscaler, you don’t need professional gear or expensive software to fix that. With just a few clicks, your travel footage can go from “meh” to movie-quality.
Why Use CapCut AI Video Upscaler for Travel Footage?
Whether you’re a vlogger, an influencer, or someone who wants to share travel memories with friends and family, CapCut’s AI Video Upscaler is a game-changer. Here’s why:
1. Turn Pixelated Shots into Polished Scenes
Travel footage is often captured on the go—sometimes from a phone, a GoPro, or a compact camera. Low resolution and compression can make the clips look rough. CapCut’s AI automatically sharpens the footage, enhancing edges, textures, and details.
2. Restore Old Travel Clips
Got clips from past adventures that were recorded in 480p or 720p? CapCut can upscale them to 1080p or even 4K. This is especially useful if you’re creating a travel montage or documentary and want all your clips to match in quality.
3. No Experience Needed
No need to learn complex editing software. CapCut’s interface is beginner-friendly and accessible on both desktop and mobile. The AI tools, such as AI Voice Generator and Auto Captions, do the job—you just need to upload and export.
How Does It Work?
CapCut’s AI Video Upscaler uses deep learning algorithms trained on thousands of real-world video samples. It recognizes patterns such as edges, objects, and motion, and intelligently fills in missing pixels. It’s not just about resizing; it’s about enhancing.
How to Upgrade Your Travel Footage Using CapCut AI Video Upscaler
Upgrading your travel clips is fast and easy. Here’s how:
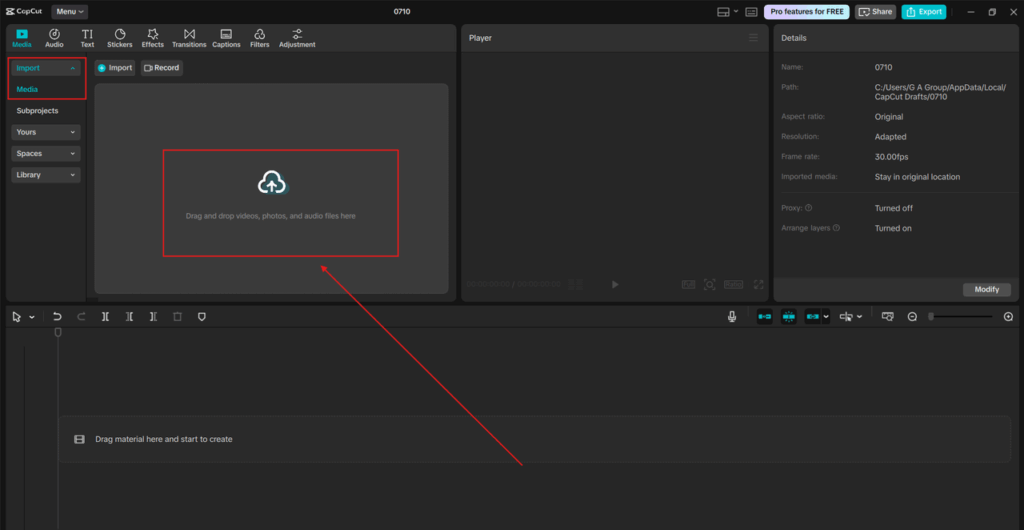
Step 1: Import Your Footage into CapCut
Go to CapCut for Desktop Video Editor. Start a new project and import the travel video(s) you want to enhance. Drag the video onto the timeline. Use short clips (under 5 minutes) for faster processing during upscaling.
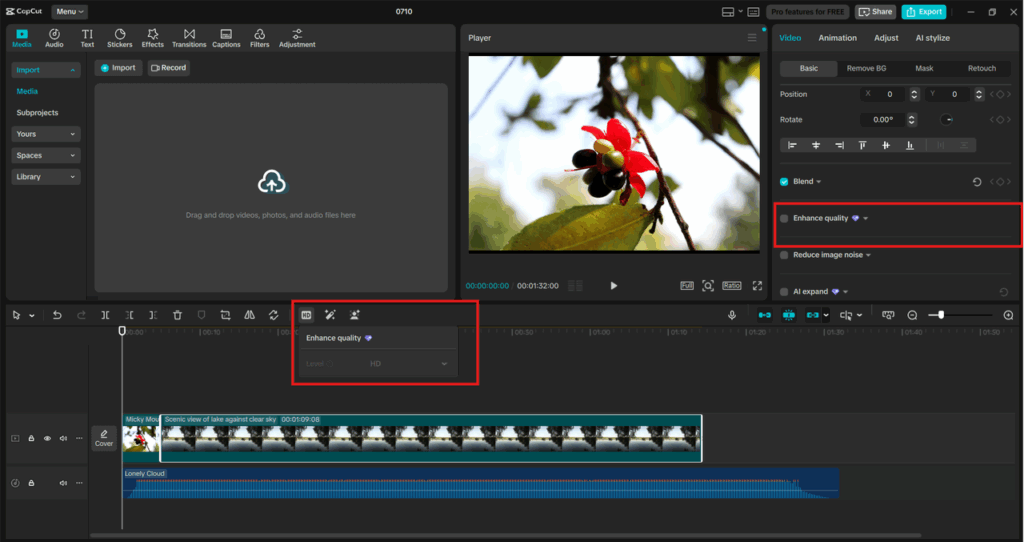
Step 2: Apply the Video Enhancement
Click on the video in the timeline to open editing options. Navigate to “Enhance quality”. Choose your desired output resolution. Select the level of enhancement (HD or UHD). Once selected, CapCut will begin analyzing and enhancing your video in the background. Enable preview mode to see a side-by-side comparison before and after. Use transitions, filters, and narration by Text to Speech AI to make your travel video more engaging.
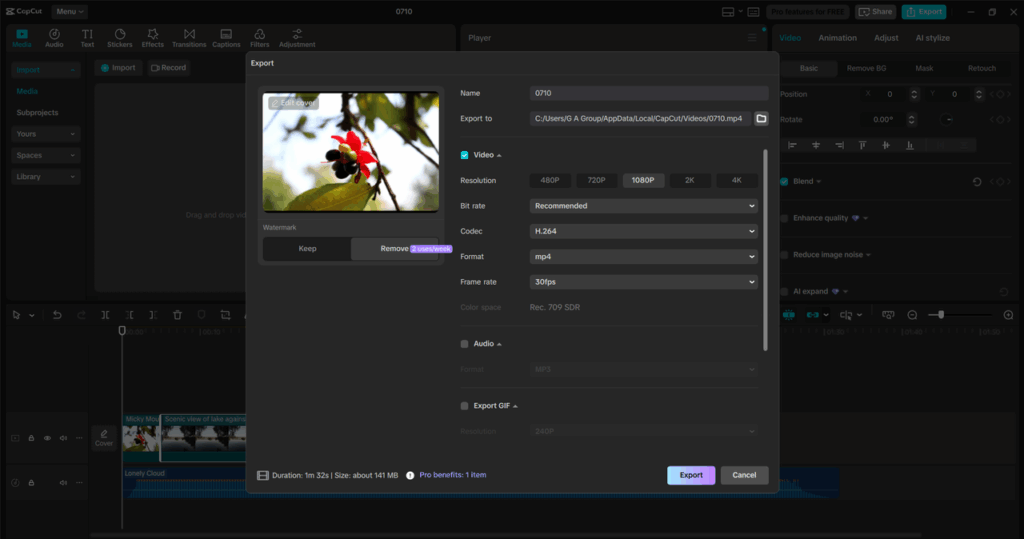
Step 3: Export and Share
After processing is complete, click “Export“. Choose your file settings and click “Export“ again to save the upgraded video. Now you can upload it to YouTube, Instagram, or TikTok—or save it as a crisp memory for yourself. Use hashtags like #TravelUpscaled or #CapCutTravelEdit to reach a wider audience of viewers who appreciate high-quality visuals.
Practical Use Cases for Travel Creators
CapCut’s AI Video Upscaler isn’t just for hobbyists—it’s useful for travel content creators looking to grow their audience.
Travel Vlogs
Upgrade your daily vlog clips for YouTube. AI upscaling ensures your footage looks professional, even if you filmed it on a phone.
Drone Footage
Enhance aerial shots taken in 720p and make them look like cinematic 4K flyovers.
Old Travel Memories
Breathe new life into clips from that 2010 backpacking trip across Europe. Remaster and share them on your modern-day platforms.
Social Media Reels
Re-edit old footage into short, vertical reels that stand out on Instagram or TikTok. The AI enhancement makes your videos stand out in feeds.
Why CapCut Stands Out
There are other upscaling tools out there, but CapCut has a few advantages:
- Free and Accessible: No watermarks, no credit cards—just quality tools at your fingertips.
- Fast Rendering: AI processing is optimized for speed, especially with shorter clips.
- All-in-One Editor: You can upscale, add music, subtitles, filters, transitions, and voiceovers—all in one app.
- Cloud Storage: Store your travel footage in the cloud and access it anytime from your desktop or mobile device.
Tips for Best Results with AI Upscaling
- Start with Decent Lighting: Even though CapCut’s AI can fix low-res clips, it works best with footage that has decent lighting.
- Avoid Super Blurry Shots: If your footage is out of focus, AI can only do so much to improve it. Stick to clear, stable clips.
- Pair with Stabilization: Use CapCut’s video stabilization tools before upscaling to ensure a smoother look.
- Enhance with Filters: After upscaling, use cinematic filters or LUTs to give your video a professional color grade.
Conclusion
Traveling is about making memories, and your footage deserves to reflect how beautiful those moments were. With CapCut’s AI Video Upscaler, you can upgrade your old, pixelated, or low-res clips into stunning high-definition videos—without paying a dime or spending hours editing. Whether you’re building a travel vlog channel, sharing clips with family, or just making your memories look better, this tool gives you the power to enhance your adventures like never before.