
Some footage cannot be recorded again, especially old clips or important captured moments. Poor resolution, blur, noise, and missing details can make valuable footage hard to use. An AI video enhancer can rebuild lost details instead of adjusting existing visuals.
Filmora provides 4 enhancement models designed to address different video quality problems with precision. Each model targets issues such as blur, noise, softness, or missing visual details. The right model can produce sharper frames, cleaner textures, and better video quality.
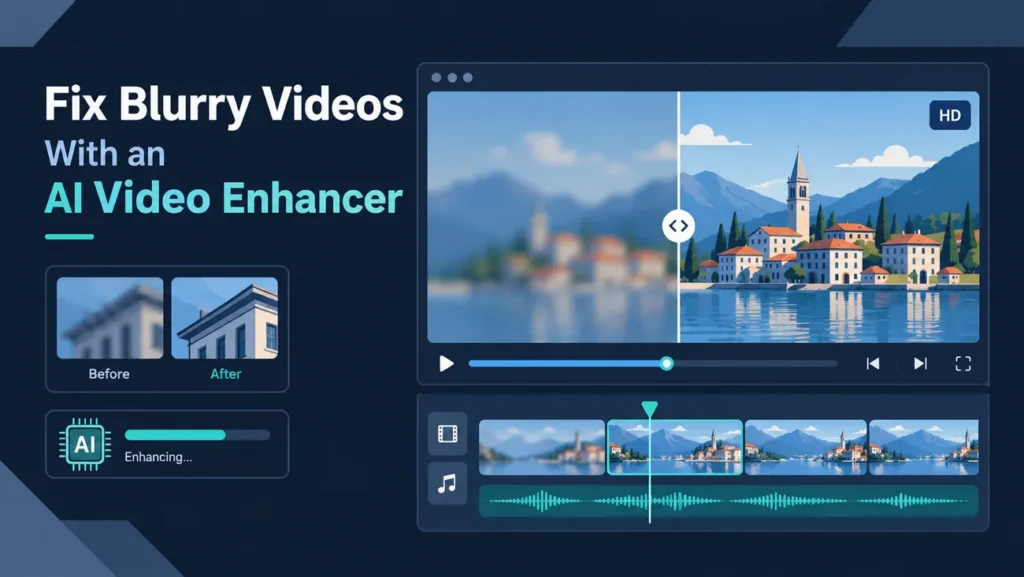
Part 1. What an AI Enhancer Actually Does to a Frame
Trying to fix blurry video with sharpness often creates harsh edges without added detail. Brightness, contrast, and sharpness can adjust pixels but cannot restore missing visual information. AI enhancement takes another approach by estimating textures and edges lost from frames.
It can reconstruct visual details affected by compression, noise, low resolution, or softness. Results still depend on source quality because AI estimates details that recordings missed. The table below shows where an AI video enhancer can improve common footage:
| Footage Problem | What Went Wrong at Capture | What Enhancement Can Realistically Do |
| Old or Archived Clips | Low resolution, compression, or repeated encoding reduced visible detail. | Rebuild edges and textures for better viewing on modern screens. |
| Low-Light and Grainy Shots | Limited light introduced noise, weak detail, and poor visibility. | Reduce grain, improve details, and make dark footage clearer. |
| Re-Downloaded Social Clips | Repeated platform compression removed detail and introduced visible artifacts. | Reconstruct lost-looking detail and reduce visible compression artifacts. |
| Product and Commercial Footage | Low resolution, compression, or soft focus reduced important product details. | Sharpen textures, packaging details, and edges for cleaner presentation. |
Part 2. Running an Enhancement Pass in Filmora
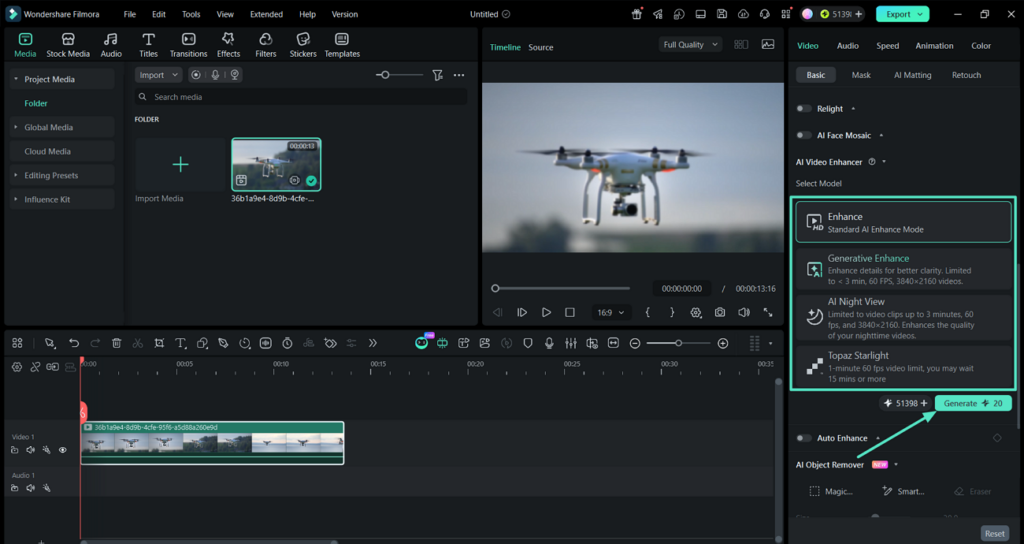
Each enhancement model targets a specific video problem and produces different results from footage. “Enhance” sharpens footage, while “Generative Enhance” rebuilds textures lost from the original frames. “AI Night View” handles dark footage, while “Topaz Starlight” works as an AI video upscaler. Follow the steps below to select the right model and enhance your video:
Step 1. Load the Footage and Find the Enhancer
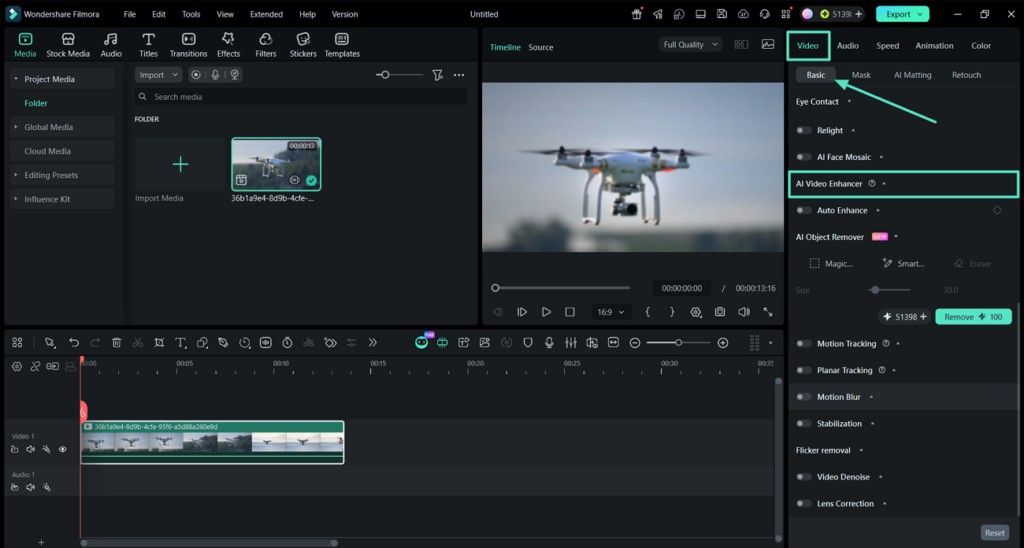
First, create a new project in Filmora, import your blurry footage, and place it over the timeline. Then, select the video and select the “Video” tab in the right side panel. Afterward, choose the “Basic” option and expand the “AI Video Enhancer” section.
Step 2. Pick the Model That Matches the Fault
Under the “Select Model” section, choose a model that matches the problem with your video. For dark, noisy, or color-shifted night footage, choose “AI Night View.” If the footage is soft, opt for “Enhance,” and if the footage has missing textures, choose “Generative Enhance.” Once the model is selected, press “Generate.”
Step 3. Run the Enhancement and Review Results
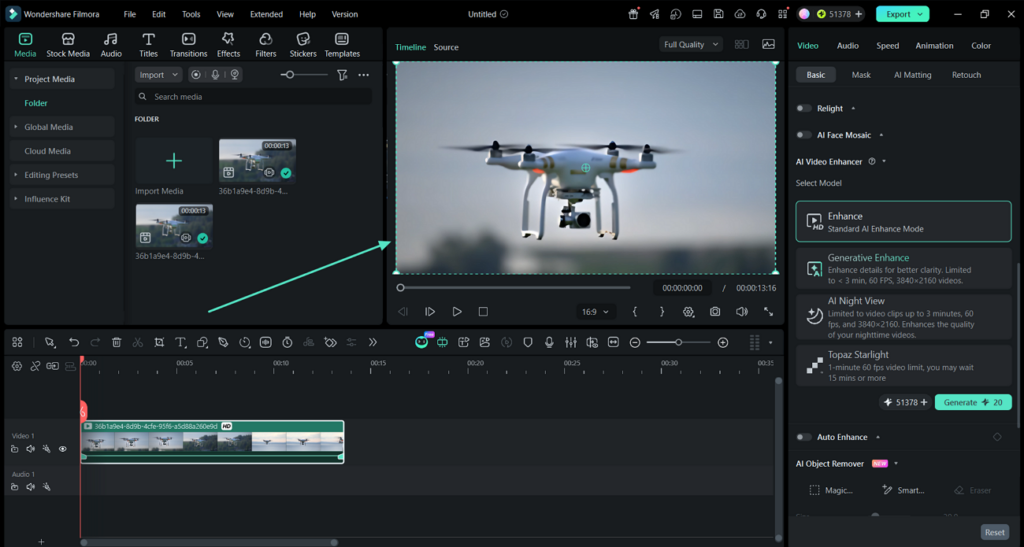
Run the enhancement and wait for the process to finish. Review the results before continuing with the rest of your video edit.
Step 4. Check Export Settings and Save
Once the video is finalized, press “Export” in the top right corner. Then, choose a format and resolution and click “Export” again to start the rendering process.
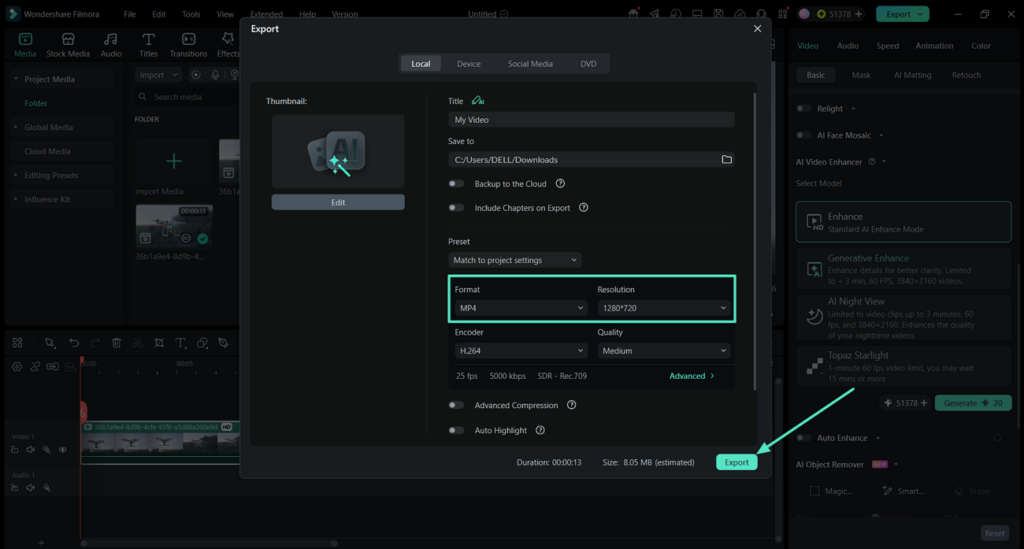
Note: Footage at or below 1080p is enhanced and exported at 1080p rather than upscaled. Topaz Starlight is the model to choose when the goal is a genuine resolution increase.
Part 3. Getting More Out of an Enhancement Pass
Good source footage and smart editing choices can improve video resolution with AI. The tips below can help preserve detail and get better enhancement results:
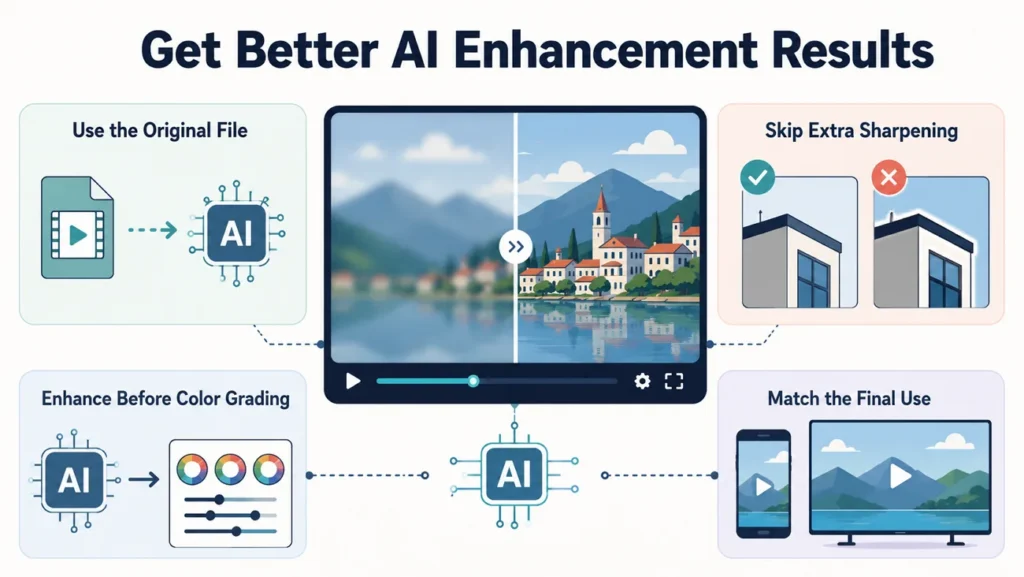
- Use the Original File: Start with the source file because it contains more detail for enhancement. Re-downloaded clips lose information through compression, which gives AI less usable data.
- Avoid Extra Sharpening: AI enhancement already improves edges, so added sharpening can create unwanted halos. Try another enhancement model when the first result still appears too soft.
- Enhance Before Color Grading: Enhancement can change contrast, noise, and details across frames during video processing. Apply color adjustments so your final look matches the enhanced footage.
- Consider the Final Use: Heavy enhancement may offer little benefit for videos viewed on small screens. Save stronger processing for large displays, client projects, or high-quality video exports.
Part 4. The Repairs That Sit Alongside Enhancement
A video quality enhancer improves resolution and noise but cannot repair every issue. Other tools inside the video editor address problems beyond video enhancement with ease. Let’s explore additional Filmora tools that can improve different parts of footage:
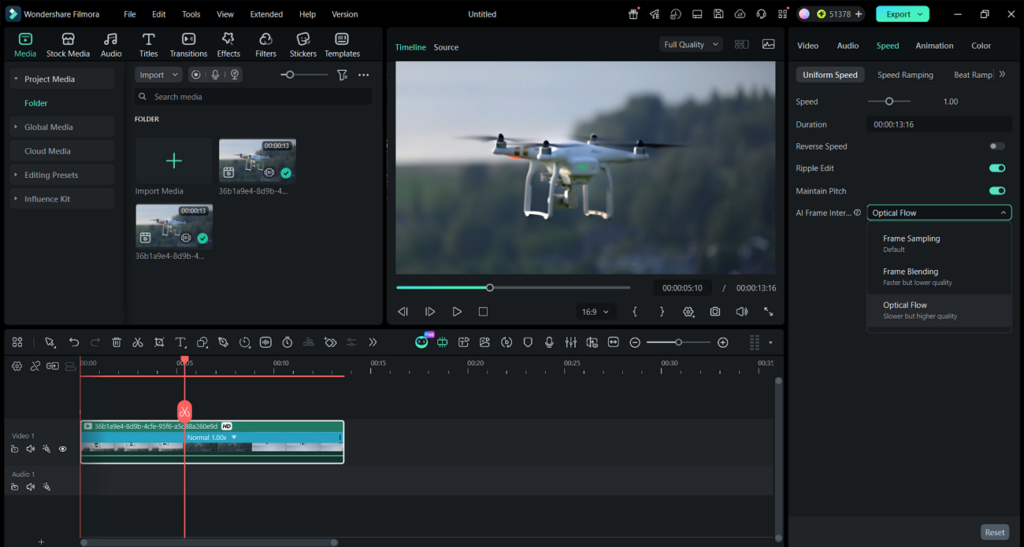
Optical Flow for Slow Motion That Holds Together
Slowing footage below its frame rate creates gaps between recorded video frames. Super Slow Motion with Optical Flow generates new frames between existing frames. This process keeps motion smooth and prevents stutters caused by duplicated video frames.
Video Denoise for Grain That Is Not a Lighting Problem
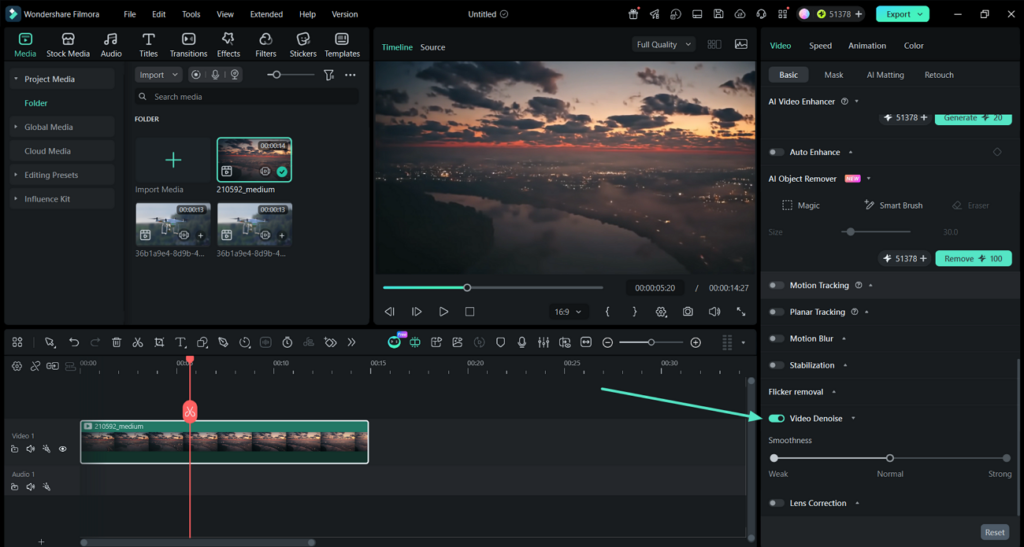
Daytime footage shot at high ISO can contain grain without dark exposure. Video Denoise removes this grain without treating footage as a low-light scene. Removing noise first gives enhancement models cleaner textures to process across frames.
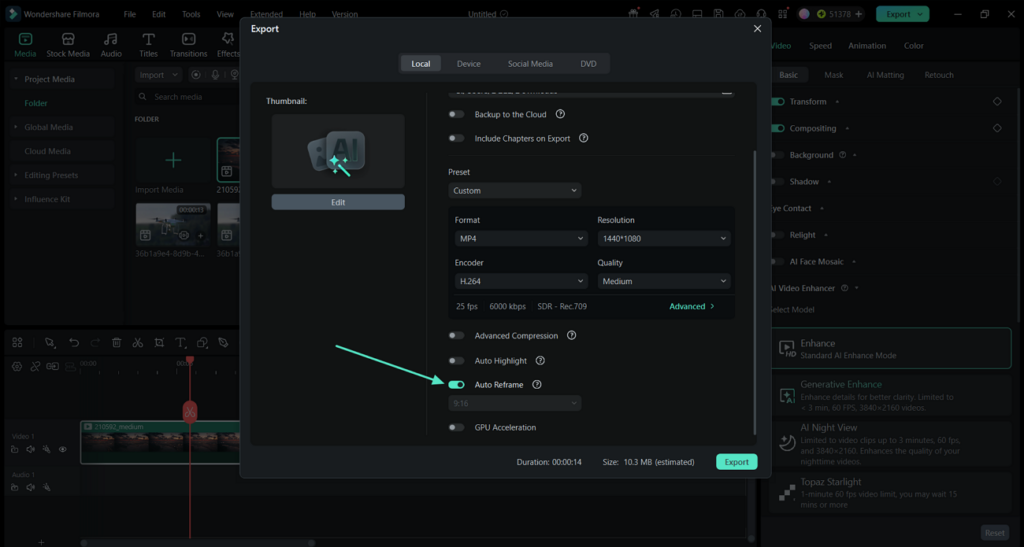
Auto Reframe When the Aspect Ratio Has to Change
Cropping wide footage into vertical formats can remove subjects from the visible frame. Auto Reframe tracks subjects across 16:9, 1:1, 9:16, 4:3, and 21:9 formats. Users can select Auto, Fast, or Slow analysis speed before processing begins.
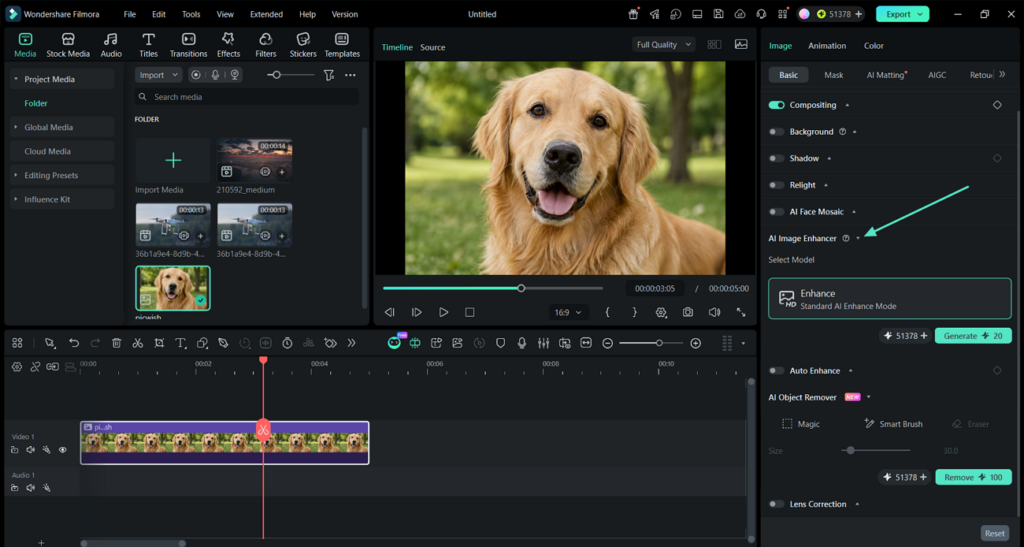
The Image Equivalent and a Name That Trips People Up
Filmora separates video and image enhancement into two tools for different media. AI Video Enhancer handles footage, while AI Image Enhancer processes still images. No dedicated feature uses the Face Enhancer or Face Upscaler tool names.
Conclusion
An AI video enhancer can improve footage when usable details remain. Better results come from matching the right enhancement model with each video problem. Good source files and proper export settings also help preserve the enhanced quality. If you want a simple enhancement workflow, Filmora can handle it within editing.
Frequently Asked Questions
The standard enhancement model improves footage up to 1080p and exports at 1080p. Topaz Starlight supports video upscaling with output reaching 4K at 60 FPS.
Focus blur represents missing information, leaving enhancement models with little detail to reconstruct. AI can improve video resolution, but severely out-of-focus footage may still remain unusable.
Processing time depends on the chosen model, clip length, and available computer hardware. Topaz Starlight supports 1-minute clips, while Generative Enhance accepts clips under 3 minutes.
The enhanced version keeps the same frame rate and duration as your original clip. It returns to the timeline without changing surrounding cuts, timing, or edit placement.
Reshoot whenever that is possible, because reconstruction is always an approximation of what a camera would have captured. Enhancement earns its place on footage that cannot be captured again.